Viewing Prescriptions
Use the calendar buttons at the bottom of the Prescriptions tab to view prescriptions for a certain date. You can view prescriptions for a day, week, or month at a time. The date you are using is shown at the bottom of the Prescriptions tab.

 Sticky Notes
Allows you to add a temporary note to prescriptions.
Creates a new Sticky for a highlighted prescription. If a prescription already has a Sticky, the button opens a menu from which the Sticky cam be opened or removed. The Sticky menu can also be invoked by using the mouse to right-click on the Sticky column for a prescription. You can also save stickies as prescriptions notes and this setting can be configured from the Workbench tab in Workflow Preferences. To learn how you can save stickies as prescription notes, see Workflow Preferences.
For more information on adding sticky notes to prescriptions, watch the video below:
 Priority
The  Priority button is accessible from Workbench > Prescriptions and visible through these tabs:
- To Do
- In Process
- Pending
- Completed
Priority button to prioritize a waiting prescription or assign one of the following wait statuses:
- Waiting: Patient is waiting in the pharmacy for the prescription. You can define the wait time for your pharmacy (anywhere between 1 - 59 minutes) in Workflow Preferences. To define the Waiting status, see Workflow Preferences.
- 1 Hour: Patient to pick up their prescription(s) within one hour.
- 4+ Hours: Patient to pick up their prescription(s) within four hours.
- Tomorrow: Patient to pick up their prescription(s) the next day.
- 2-3 Days: Patient to pick up their prescription(s) within 2-3 days.
For more information on the Priority button and wait statuses, see Prioritizing Prescriptions Using Wait Statuses.
 Grouping
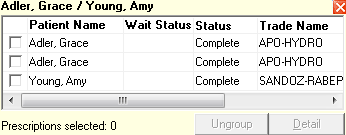
The Grouping button allows you to group multiple patients together. To group multiple patients:
- Navigate to Workbench > Prescriptions.
-
Select either the To Do, In Process, Pending, Completed.
- In the tab selected, select at least 1 prescription for each patient you want to group together.
- Select the Grouping button. The PharmaClik Rx - Prescription Grouping window opens.
- Click OK to confirm the prescriptions you are grouping.
Result: The selected prescriptions will be grouped together. Select the Patient name to open the Active Tooltip window to view the patients grouped together.
 Prescription Counts Calculator
The Calculator button on the Workbench opens the Prescription counts window, which provides the number of prescriptions that have been processed for the date displayed on the Workbench.
 Calendar
The calendar button opens the Workbench calendar, which allows you to select a daily, weekly, or monthly view of the prescriptions on your Workbench. You can also select a specific date (either from the past or in the future) to view the prescriptions for that day/view.
 diem® premium care Dashboard
The diem premium care button opens the diem premium care dashboard. The dashboard lists the number of unread notifications you have for med sync and appointment requests. A Messages Tab button is also available which takes you directly to the diem Notifications tab (within the Messages tab).
 Patient Centre
The Patient Centre button opens the PharmaClik Rx - Patient Centre window where you can do the following:
- Go to Patient Centre.
- Launch Medication Review Workbench.
- Perform a Medication Review now.
- Schedule a Medication review appointment.
 Date
Date
The date you are currently viewing is displayed here.
 Calendar Browse
The calendar button displays the Workbench for the current date. You can use the arrow buttons to view the Workbench for a different day.